Photography is key to branding your product.
As you know, you have a 7 second window of opportunity to engage with your customers in store.
Displaying a clear idea of what your product can do for a customer is imperative to catching their eye and their wallet.
Photos play a big portion of your packaging design and branding. So, having an image that clearly tells your product’s story is imperative.
Article Contents:
1. The Plan
2. Designing Your Photo
3. The Different Ways to Photograph Your Product
4. Equipment List
5. Reflective Products - How to Handle Them
6. Food Photography
7. Photography Models
8. Hand Models
9. The Set
10. The Photo Shoot Out-Takes
11. The Final Images
Always keep in mind your products key benefits and any differentiators from your competition when shooting, and make sure they are visually prominent.
What steps do you need to take to get that photo? Let’s take a look behind the scenes at what can go into photographing your product.
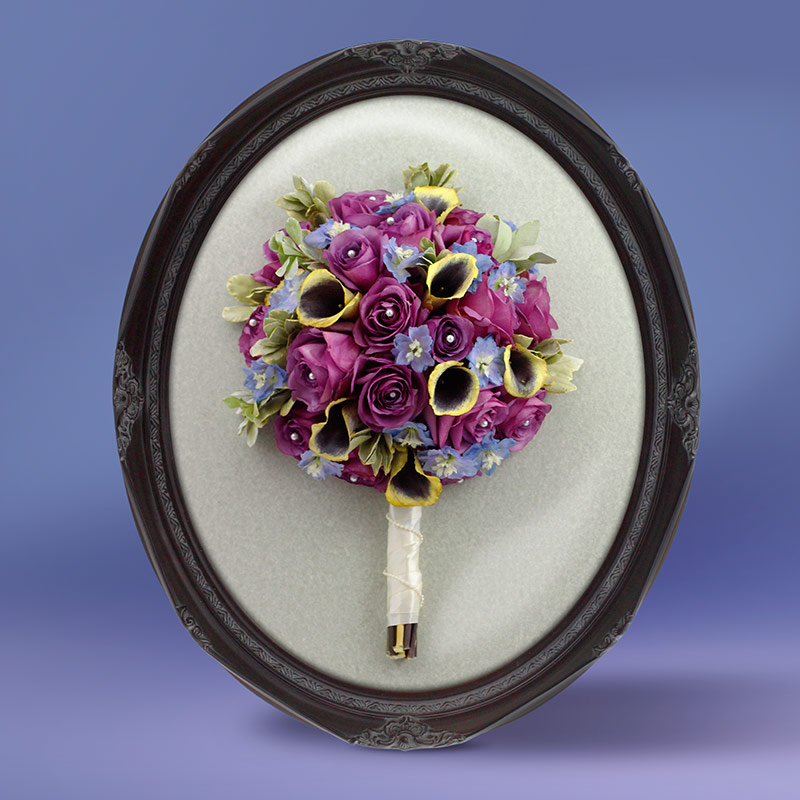
 |
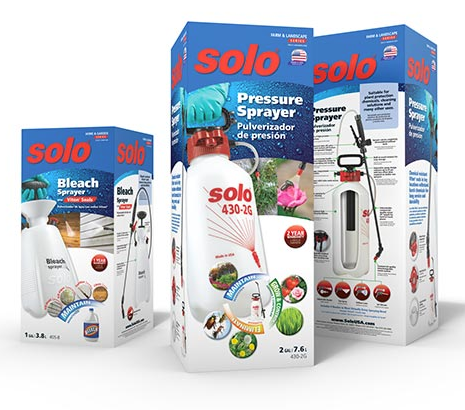 |
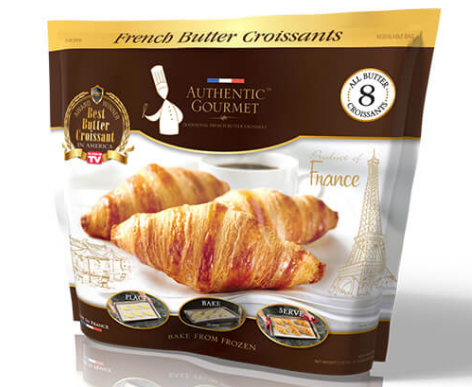
| Food photography used for product packaging. | Product photography used for retail packaging design. |
1. The Plan
A lot of people jump right in and photograph their product without a plan for end usage. That can work out fine sometimes and can fit many marketing purposes but having a plan prior to shooting can take your photos to the next level.
How would a photo best benefit your layout.
So, let’s determine final usage. How would a photo best benefit your layout. Will it have to do ‘double duty’? - meaning be used on a package AND be used for other marketing?
Most likely it will have many uses. And its good to start building digital assets to promote your product.
2. Designing Your Photo
Sometimes photographs are completed first and a designer only has those images to use so they design (a package, sell sheet, brochure, etc. ) ‘around’ the image.
But occasionally, the designer can design the photo to fit the package OR final marketing piece they are working on and provide the photographer with a guide. Whether that’s a package, printed piece, or website.
If your are using a designer to design your package, it may be beneficial to get their input, as they may be able to suggest some photo direction that you may not have thought of.
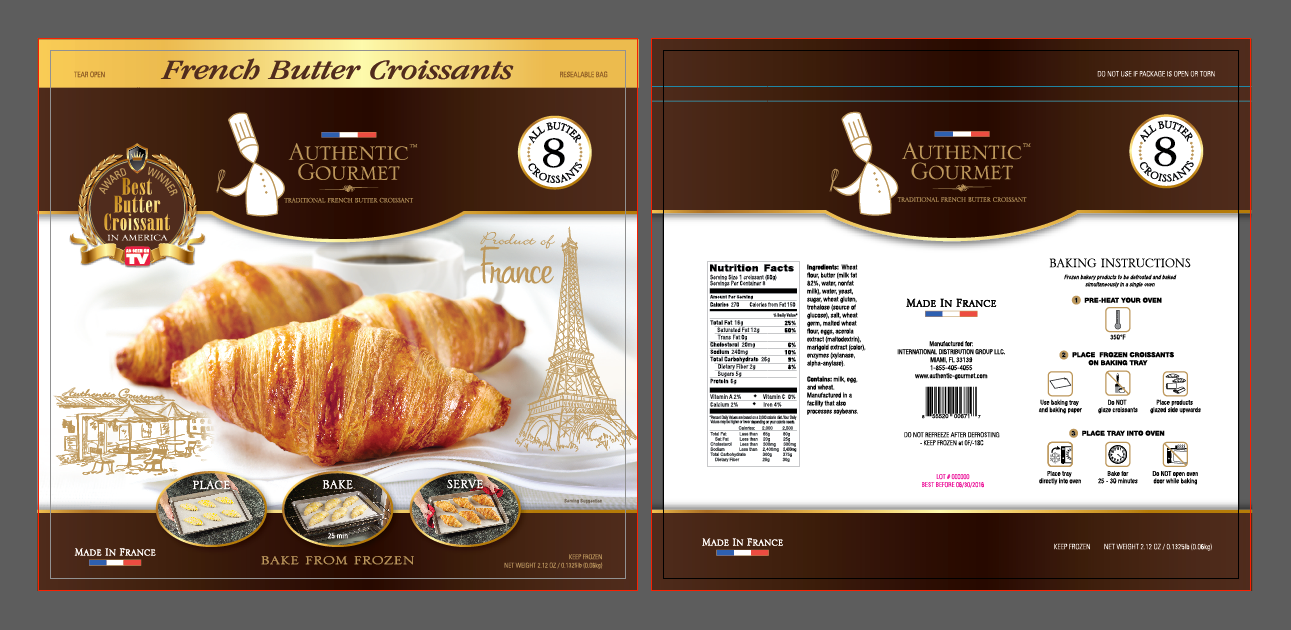 |
| Series of food photography to show the steps of product preparation on the retail packaging. |
A lifestyle image is a direction that many companies also use to show the story of their product.
A lifestyle image usually contains a member of your core customer audience using and/or enjoying your product. These photos are usually much more involved than a simple product on white photograph.
A lifestyle image usually contains a member of your core customer audience using and/or enjoying your product.
These images usually contain a person of your audience, in a setting: outside? in the kitchen? tool-shop? bathroom?, wherever its appropriate and displays your product’s abilities to its best use (advantage).
3. The Different Ways to Photograph Your Product
Photographed On White
Just as it sounds, this is a photograph of your product on a white background and is also referred to as a “Hero” or “Beauty” image.
To accomplish this, you’ll most likely need to use a white seamless stock backdrop behind your image when photographing and then you’ll need to drop out or knock out the background in Photoshop.
That’s because even shooting on white does not give you a true white background. There is always a tone and shadow left in the image you’ll need to contend with.
Dropping out the background entails creating a clipping path around your product within the digital image and then dropping that out to 0% color. Sometimes you might want to add a shadow under or behind the product to make it look more natural.
 |
 |
| Set-up for shooting a product in use. | |
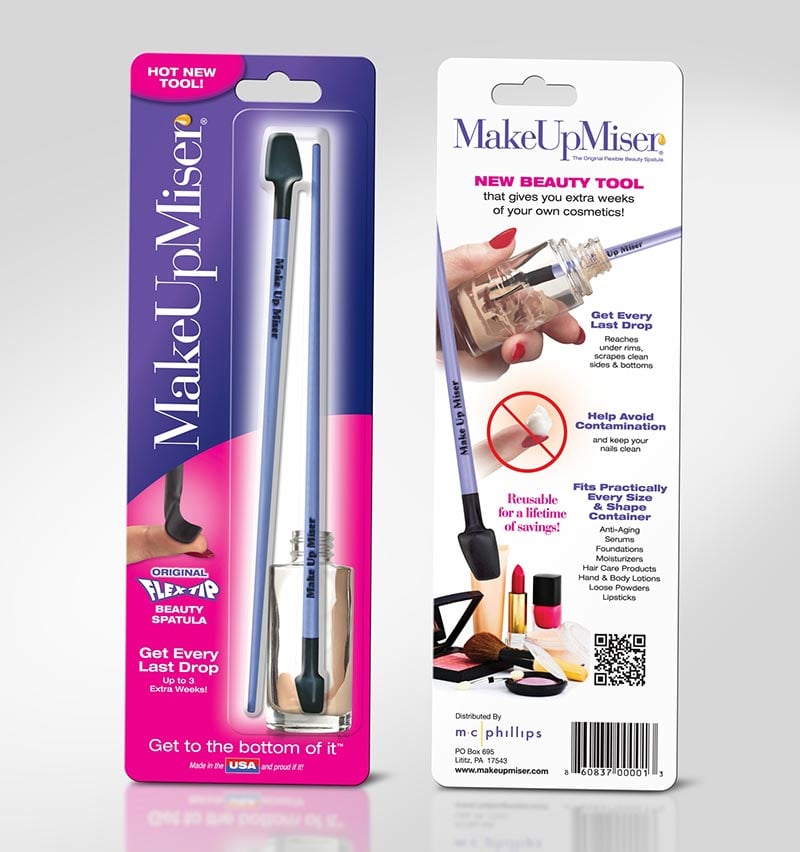 |
| The final packaging using the product photography of the product in use and beauty shots. |
Photographed With Props
Propping an image can add a little and sometimes a lot of time to your photography session.
It will depend again on what you are trying to accomplish.
Perhaps you need something near your product to give it size context, like a golf ball near a glass that looks like a golf bag. Most people know approximately how big a golf ball will be, so they can infer the size of product from that.
Propping can also take on a whole other type of meaning. Say you needed an earthy feel to your product or you needed to show ingredients your product was made with.
This will require some prop hunting, unless you know just where to go for old barn wood. Or fresh food ingredients.
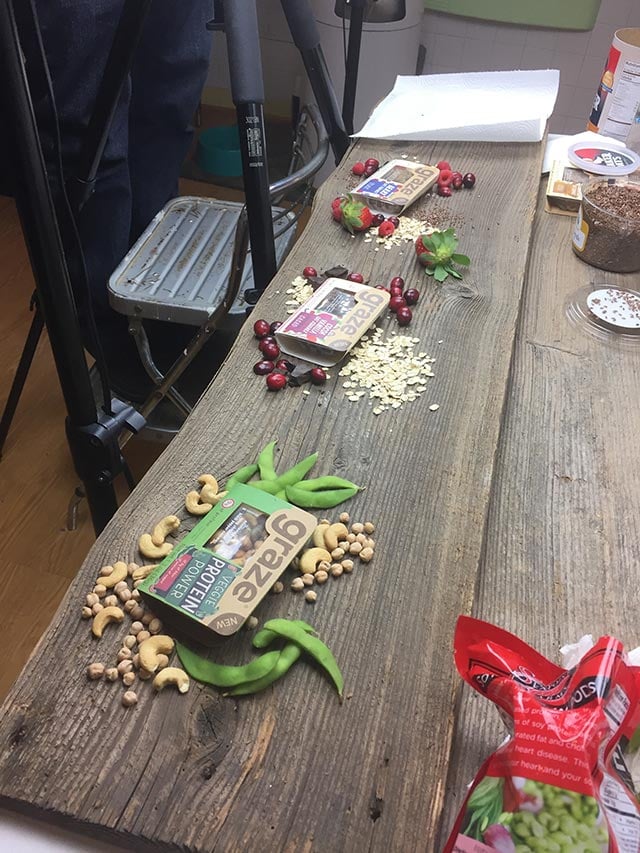
 |
| This photo was taken during the photoshoot which shows how many props we needed arranged on the set we built for this photograph. |
 |
| This image shows how the completed image was used on the client's final package design. |
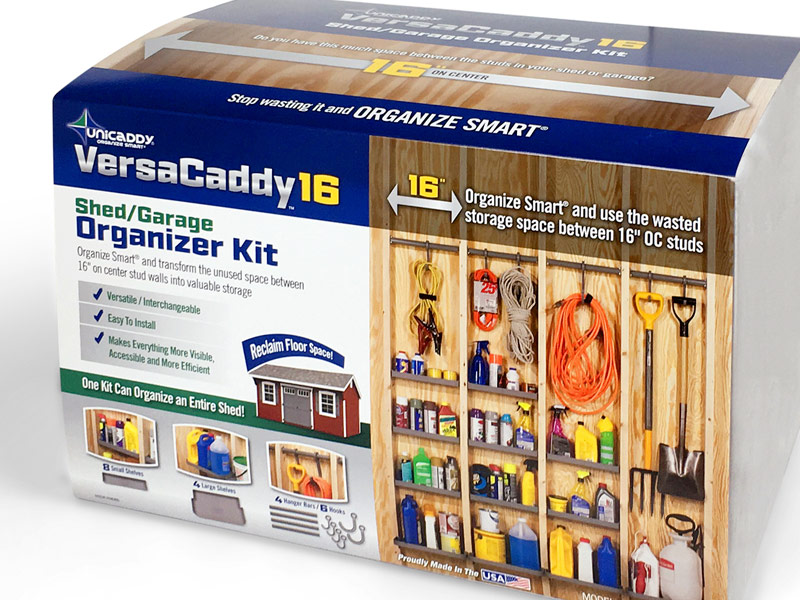
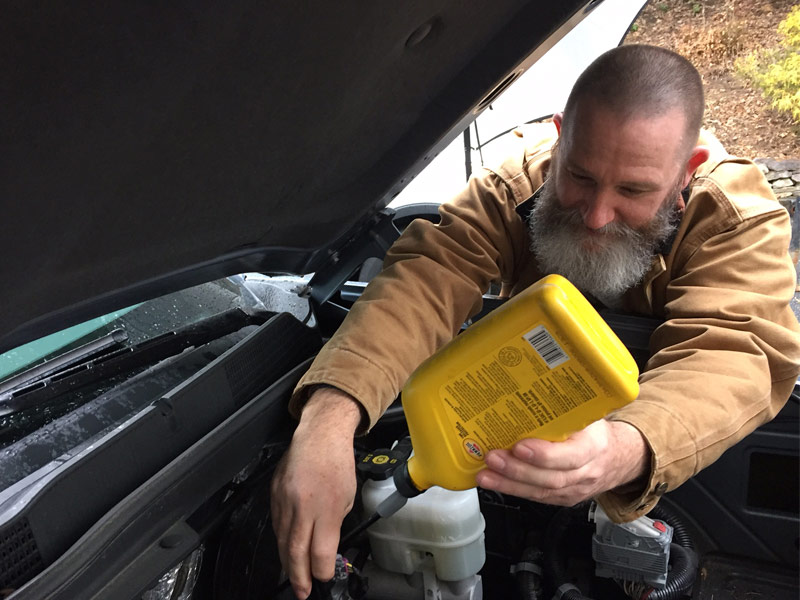
Photographed In-Use
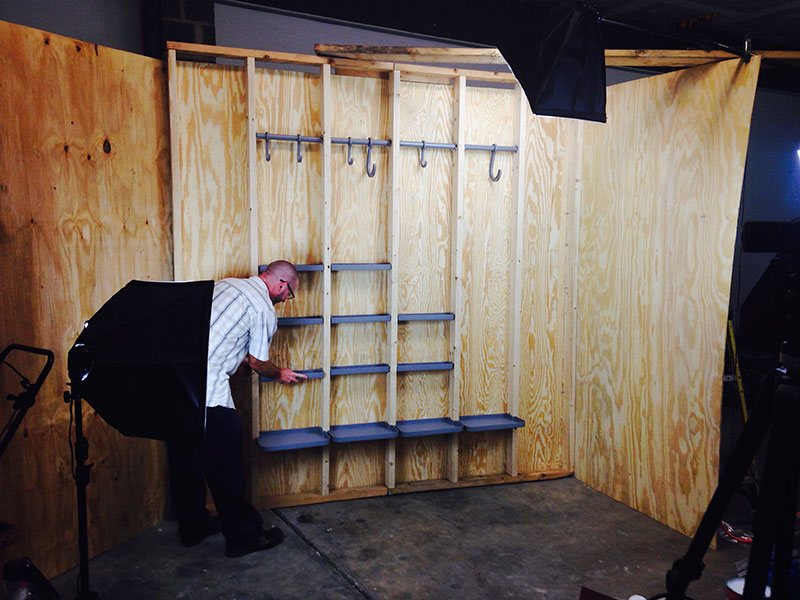
Also know as an ‘application’ or ‘lifestyle’ shot to show how to use the product. This usually requires a set or a location that best describes where your product is used.
Such as a specific room in a home or a back yard. For instance, if you are showing how a storage product works, you’ll need to show where that product is installed, what does it hold or make more convenient.
See more info included in ‘The Set’ section of this article.
 |
 |
|
| Before retouching, removing the background and adding reflections. |
Final image as it was used on online. |
Detail Images
What does the product do? What’s it function? Should it be shown on the package doing that function? Do you have room on your package to show all these images?
If your package has one or two features that clearly make it unique from others, consider shooting close-up detail shots to best show them off.
These are many times used on the back of packages as specific feature/benefit shots.
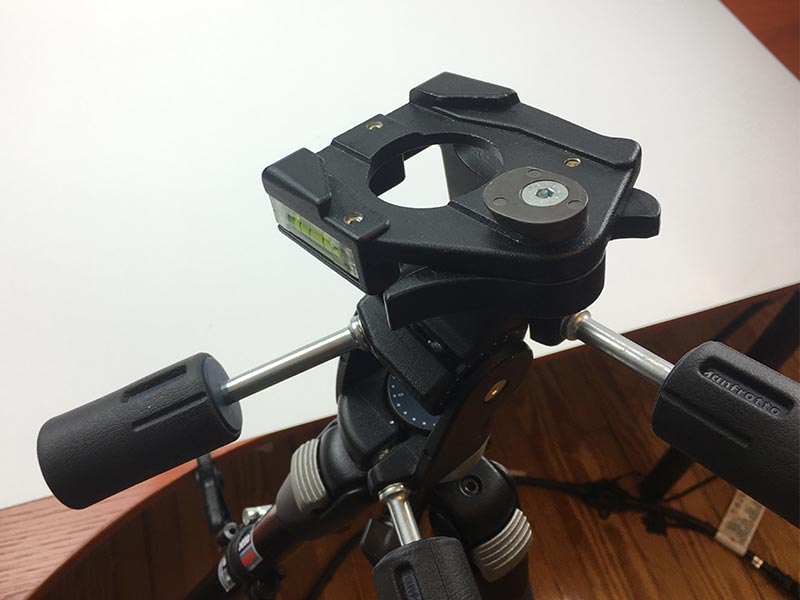
4. Equipment List
The best piece of equipment required is a sturdy tripod.
Lighting - Soft boxes to provide bright, color balanced daylight and light stands to support lights in the correct position.
 |
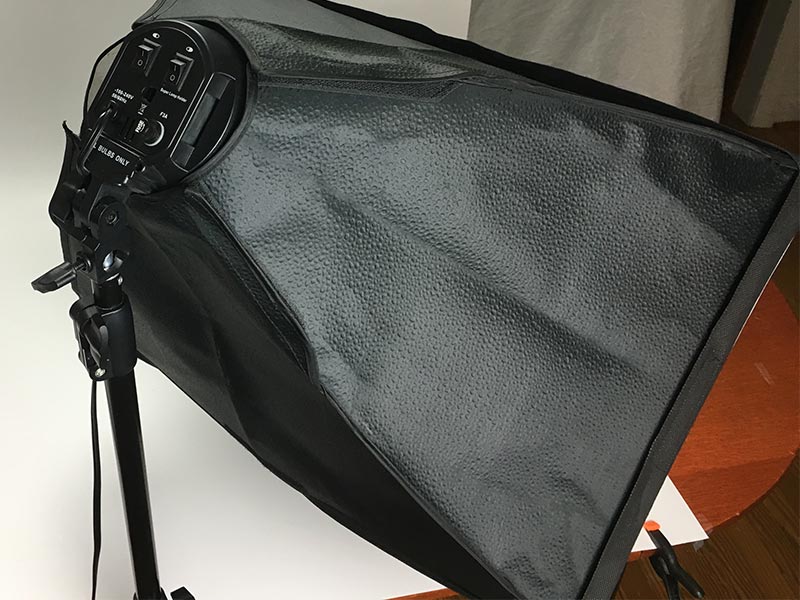 |
| Professional Tripod | Studio lighting with daylight bulbs. |
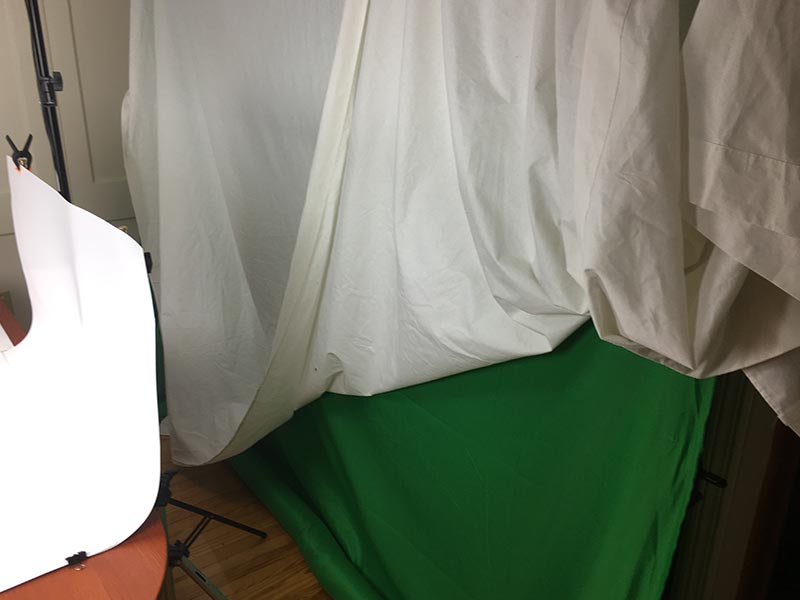
Backdrop - Black or white are pretty standard but different colors can be used if appropriate.
 |
 |
|
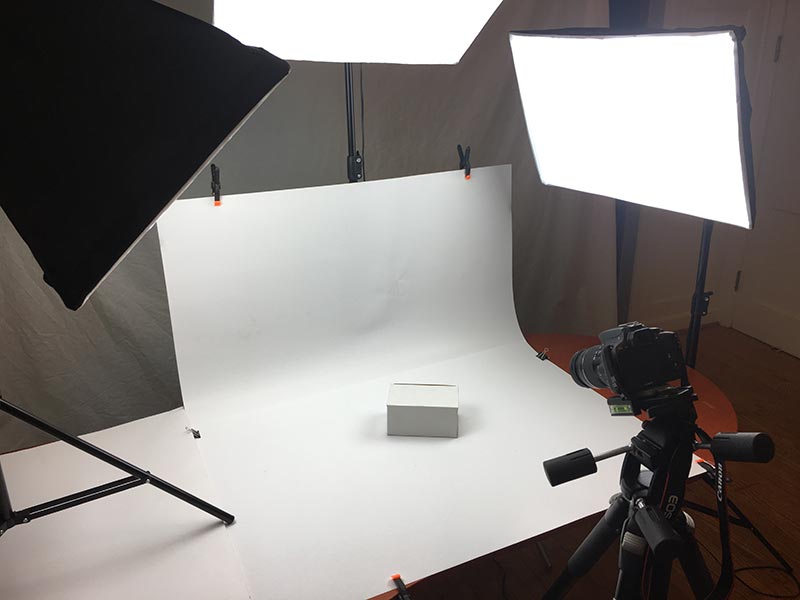
| Various solid color backdrops. We use the green for videos. | Basic studio setup with lighting. |
Clear workspace with a sturdy table to position the product and a way to hang a backdrop behind the product to provide a clean background.
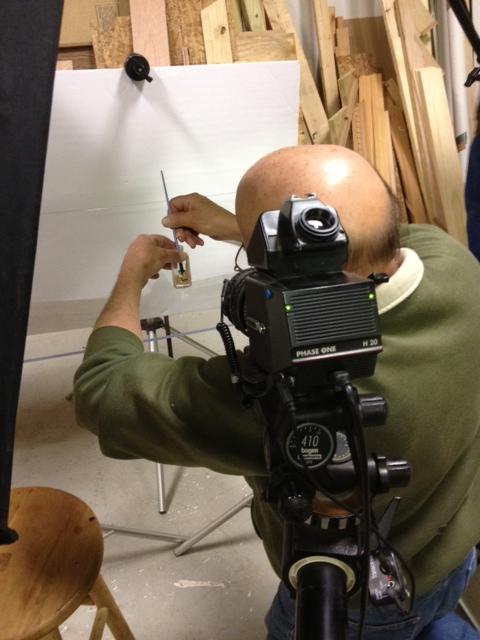
A camera of course. – We use a Canon single lens reflex (SLR) with various lenses.
 |
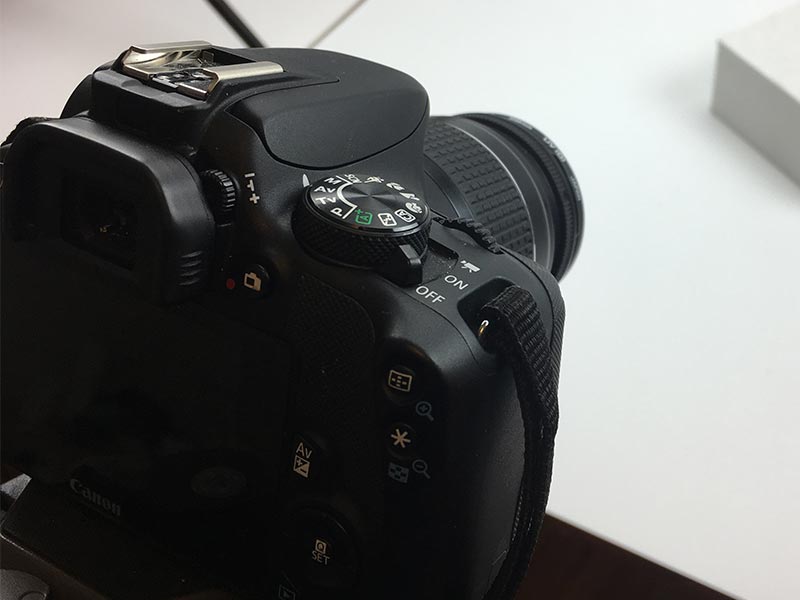 |
| Studio box to reduce reflections. | Professional single lens reflex camera (SLR) |
Lenses
Depending on the size of the product you are photographing the right lenses makes all the difference.
Lenses with a focal length of less than 35mm are considered wide angle and are used for wide shots of large objects and environments.
Focal lengths between 50mm-135mm are be used for general purpose photography where you need to focus on a product or subject without the distortion of a wide angle lens.
Macro lenses capture ultra fine detail of very small objects like jewelry or electronic components.
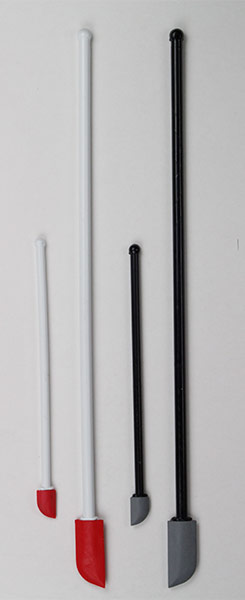
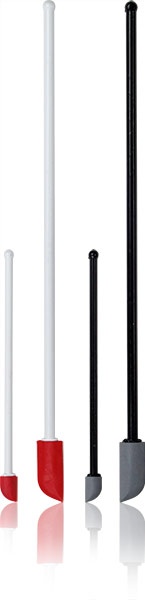
(The images below were photographed using a macro lens. The backgrounds were then removed and a drop shadow and reflection added to the final image.)
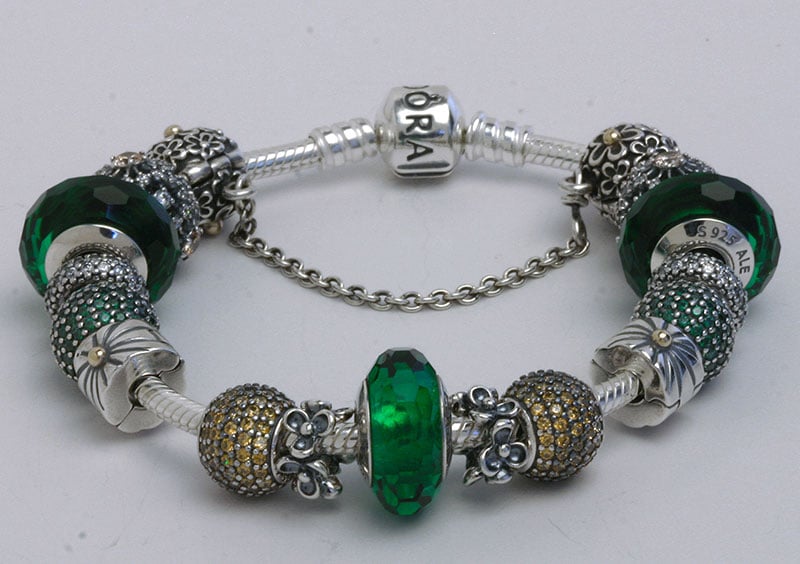 |
| Image prior to retouching. Photographed with a macro lens. |
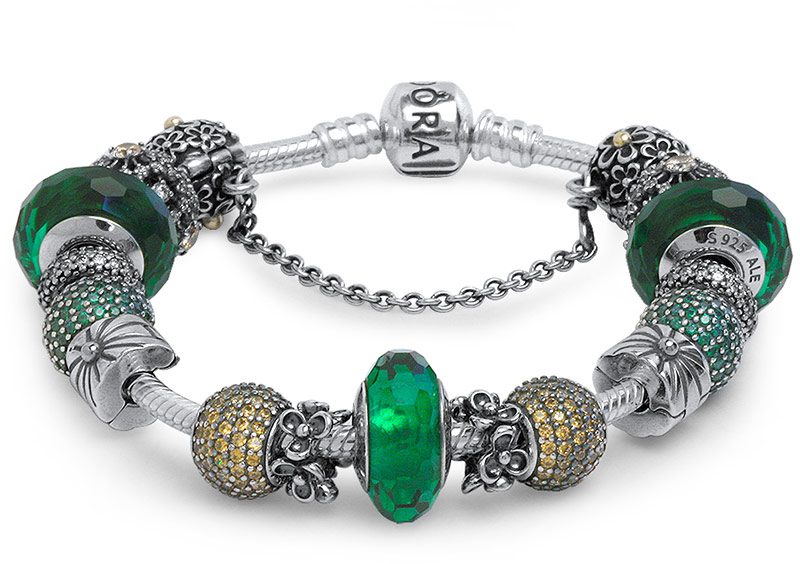 |
| Image after retouching. The background has been removed and shadows/reflections added. |
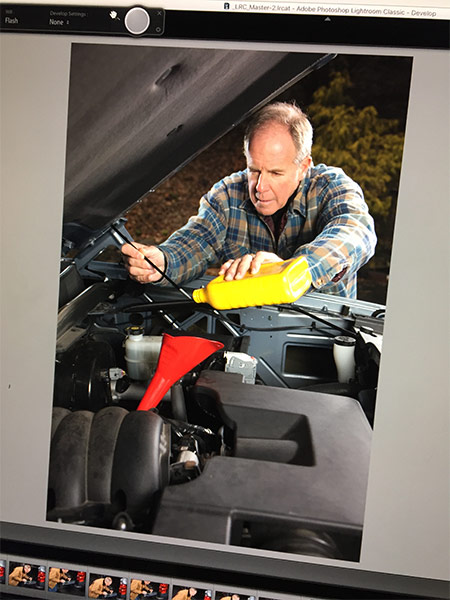
Software
Once you’ve downloaded images from your camera you’ll need photo editing software to adjust color and contrast, remove blemishes and crop the image.
The backgrounds of images can also be removed or reflections added. Once the background is removed you can add a new background of your choice such as color gradients or additional products and props.
Most professional photographers will use Adobe Photoshop or Lightroom to retouch photos.
5. Reflective Products - How to Handle Them
Many products contain reflective surfaces that will make your job to photograph them harder.
Without precautions, you will end up with hot spots and unwanted dark spots on the product you are photographing.
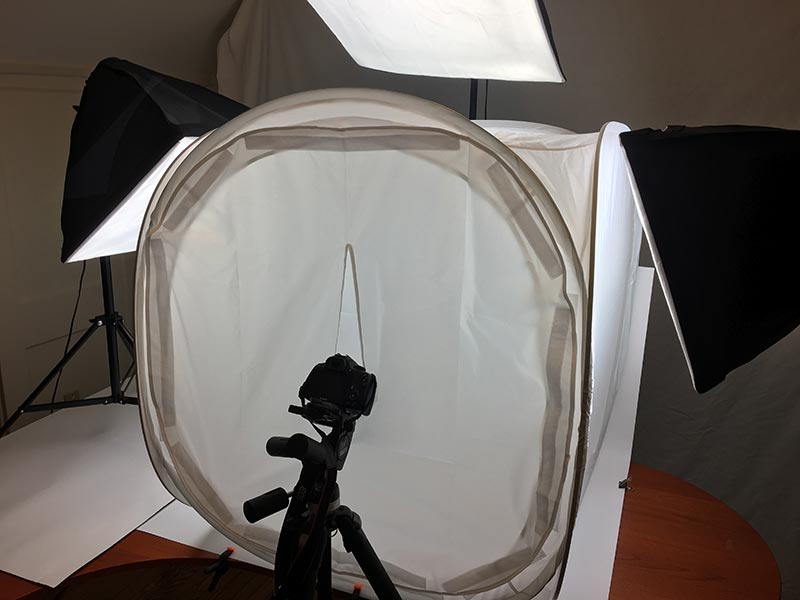
To eliminate having your camera show up in the reflection of every image, I would suggest you invest in a white shooting tent (see image) that you can place your reflective product inside and light from outside it.
It will make those photographs of the most reflective products go much easier.
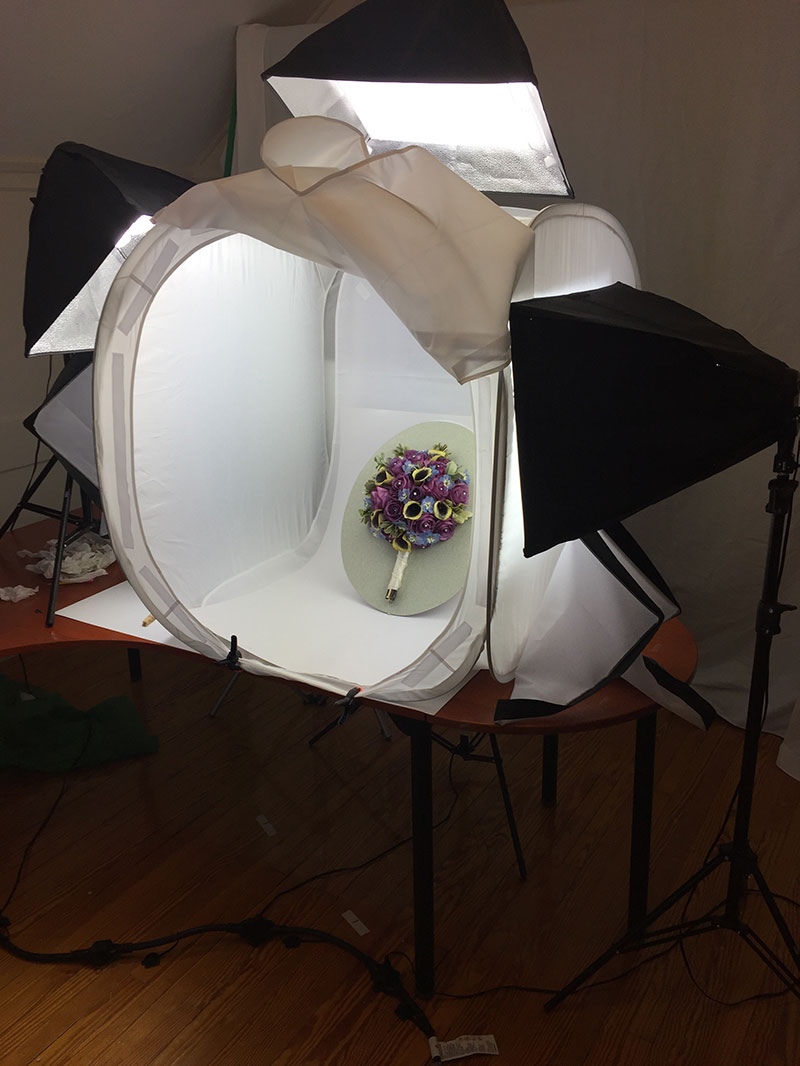 |
| This was our setup with a studio box to prevent glare from the reflective surfaces we were shooting. |
 |
| Final shot retouched with the background knocked out and replaced with color gradations. |
6. Food Photography
Photography is ‘usually’ a MUST for food packaging. I say ‘usually’ because, I’ve seen some examples of packaging where an image wasn’t used.
Usually that will be found on a product package where you pretty much know what the food will look like (potato chips, soup, packages that contain a window to show the product)
But for the other 95% of food packaging, that photograph is the ONLY way to advertise what your product will look like and suggest what it will taste like.
So getting food photography right is very important.
Some items to keep in mind when shooting food:
You’re going to need lots of it. That’s right you’ll go through quite a few strawberries (or whatever your are shooting) just to find the ‘perfect’ one to photograph. So, start with a box or flat of strawberries just to find the good ones. Same can be said about pretty much all foods. Maybe you have a friendly grocer or helpful farmer’s market contact that can help you source those foods needed?
We shot croissants and it was very difficult to get just the right toasty brown look, shape, texture. Once they are out of the oven, they start to wilt, so shoot fast.
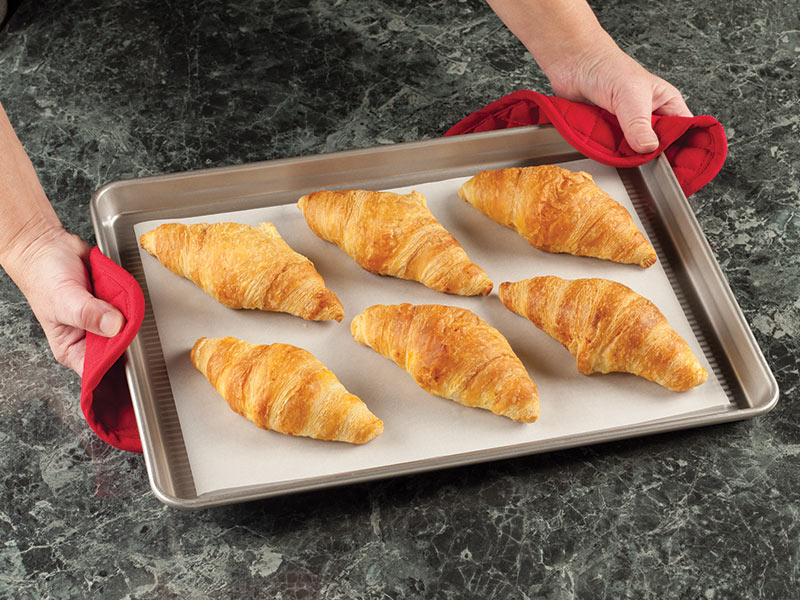 |
| Perfect! This was the shot that contained the perfect amount of browning. |
Many photographers will employ a food stylist when cooked food, liquids or complex staging is required. Again if your budget is large enough I say go for it!
Some less styled foods may be just fine to take on your own. Such as dry foods, or straight out of the bag foods. You’ll need to judge what you can do. You don’t want to under deliver, especially is someone is basing their product sales on what image you can put on their package.
Another point you should consider is whether you have a kitchen handy. You’ll need it to prepare your foods. Don’t try to do this in your garage.
 |
| Be prepared. Make sure you have all the props you'll need. Running back and forth to the store will take a lot of your time. |
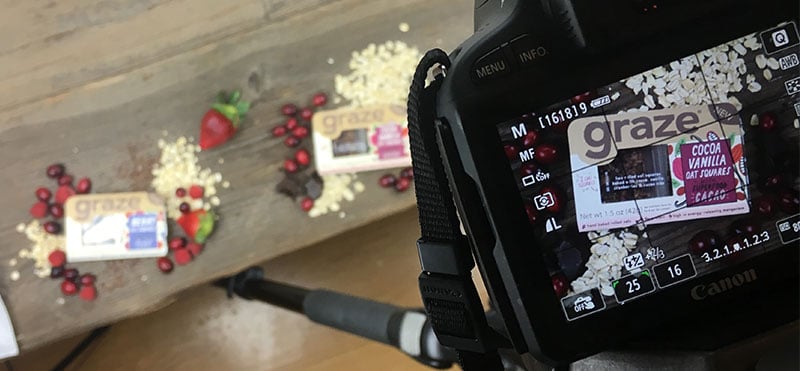 |
| During this photoshoot we set up 3 different products with food props separately so we could be shooting one setup while preparing another to save time. |
7. Photography Models
Models – a whole article could be written on this topic, but here’s the basics as I see them.
Things to consider when considering models….
- Obviously the cost of models will be your main point of consideration
- Professional vs. Amateur
- Model release form (Download our model release form here)
You usually get what you pay for, so if you just need hands or parts of bodies, then amateurs can work well for this. College students are a good source for inexpensive models as long you have connections.
When you start needing faces, different ages, etc it helps to have either a big set of friends or a budget that allows to hire professionals.
We’ve paid anywhere from $75 to $300 for amateur models. And it usually depends on whether they are needed for a half or whole day.
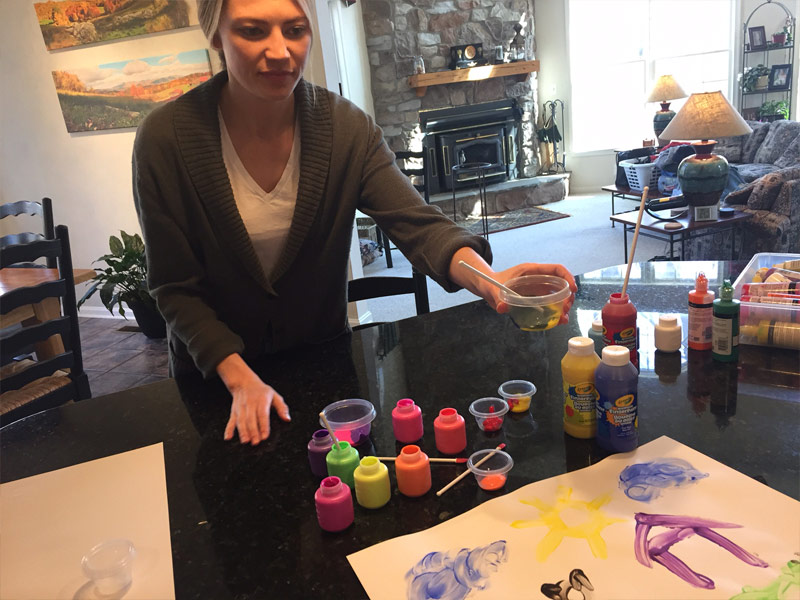
To keep the time needed for them to be on set down to a minimum, try to use a ‘stunt’ models, so you can get your lighting and background figured out before getting the ‘real’ model to stand in.
 |
| Here, Mike standing in for the professional model to save time during the photo shoot as well as provide the photographer with a guide for the final image. |
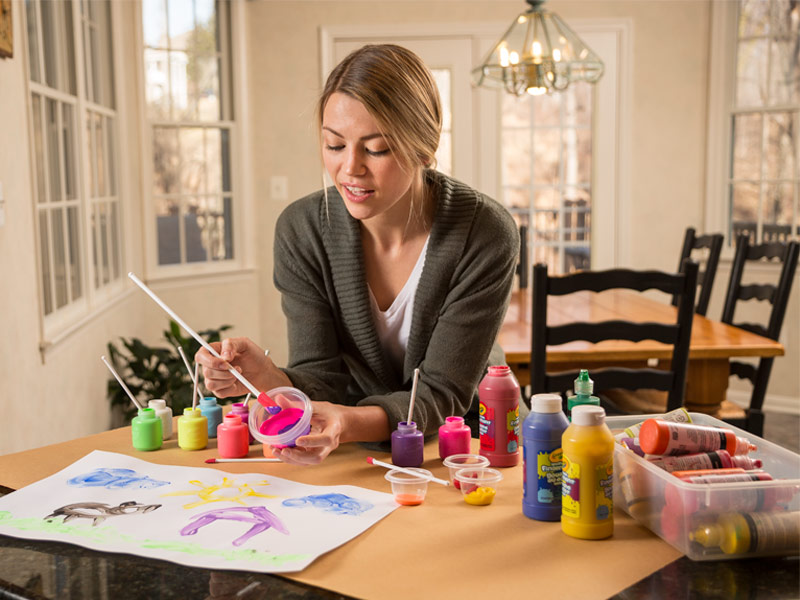
 |
| This is the final image with the professional model selected from a digital contact sheet the photographer provided with all of the images captured during the photoshoot. |
Face models, body models, hand, male/female, age specific, Mom? Business look? What look are you going for?
 |
| Model on the set preparing for the shoot to begin. The entire room had to be staged, plus all of the props. |
 |
| The final shot with the professional model used in product marketing. |
8. Hand Models
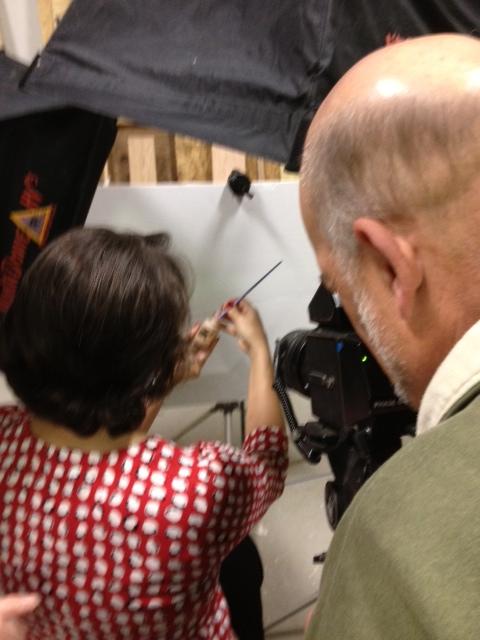
Prepping for the shoot. Build that manicure into the budget!
Do you need hair and makeup for this shoot. If your focused on the face, you’ll either need to depend on the model for their own make up or you’ll need a stylist.
A Stylist is just that, someone that can do hair and makeup. Some people are good enough to make a career of this service.
So, if you need this service for your photograph, you’ll need to add this to your budget.
Same could be said for a model’s wardrobe. Should you ask the model to bring a suitcase of clothes with them OR will you be supplying the wardrobe?
If you are supplying, is it just a simple outfit , t shirt or will you need the model prior to the shoot for fitting ?
9. The Set
A set refers to anything in front of the camera. So, it could be a simple table with a seamless behind it OR it could be entire staged room where your product or people will be using your product.
Depends on whether your shooting product images that just need to be knocked out to white OR whether you are shooting to show the product in use.
When you need to have a specific background, most ‘sets’ need to be found OR you need to design with a set in mind.
Some sets could be built. Some may only need a certain background. Sand, grass, old wood, colored paper?
I remember ‘back in the day’, we built some elaborate sets inside a studio so we could best control the lighting. Photoshop has really cut into that need.
When you need to have a specific background, most ‘sets’ need to be found OR you need to design with a set in mind. What’s possible? What does your budget allow for ? What’s available?
There is also the possibility of add a ‘stock’ background to your photo image. That is, using a royalty-free stock image during post-production, where you can strip it into your photo. There are many options for high quality stock photography available.
Here are a few:
www.istockphoto.com
www.shutterstock.com
stock.adobe.com
www.dreamstime.com
www.pikwizard.com
A few free stock photo sites:
pixabay.com
pexels.com
unsplash.com
https://www.chamberofcommerce.org/findaphoto/
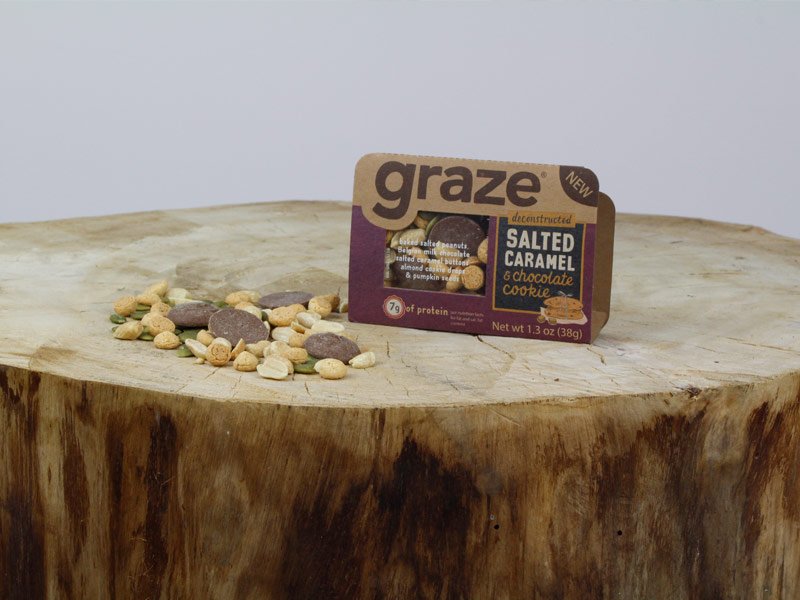 |
| The product packaging photo as it was shot in studio without a background and staged on a stump we used as a prop. |
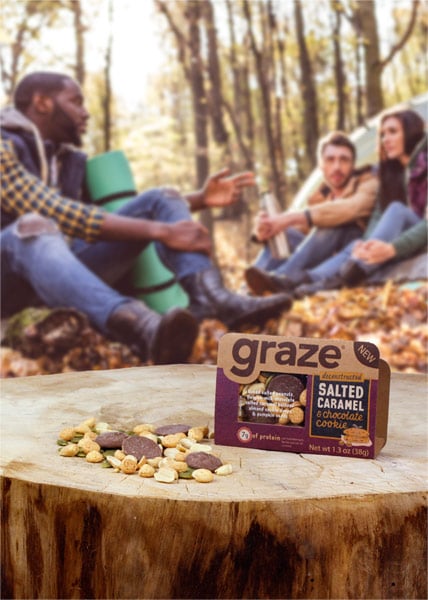 |
| The final image. The background was removed and a stock photo was added behind the original photo. |
A set can also be a location. Where can you shoot? What’s convenient? Can you take your equipment to the location?
Do you have time to travel to a location for shooting? Don’t forget to prepare for unexpected weather.
10. The Photo Shoot Out-Takes
Choosing the right image. Multiple images are usually taken of your product or models. This is to ensure you are getting the right lighting or the right expression. The right hand motion, hair flip, etc.
Most times you’ll want to create a proof sheet of all shots so you can compare one to another easily.
If more than one person is involved in choosing the best image, a proof sheet will come in handy so all are looking and commenting on the same images.
11. The Final Images
We often have clients that say they have photography for their packaging only to find that they have small, low resolution images that they use online.
Photography for packaging should best be larger than needed, and have a resolution of at least 300dpi for print. Smaller images can be made from these larger shots, but it is difficult to make lower resolution images larger without compromise – especially ones saved for web use at only 72 dpi.
Another benefit when saving out your final images is to keep a copy with any clipping paths and layers created in post production software, so that they can be utilized or changed at a later date.
What are you planning to photograph? If you found this article helpful OR still have some questions on your project, please let me know in the comment area below.

Do you need food product packaging design? Or do you need designers that can photograph your product or direct professional photographers to get the image you need to make sales for your product? Call 410-337-0066 or email for a free consultation today.
Additional articles you may find helpful:
10 Step Process To Create Packaging Design That Sells Your ProductYour Package Should Tell A Story
How Branding Improves Customer Perception of your Product