A Definitive Guide That Explains The Steps Necessary To Package Any Product
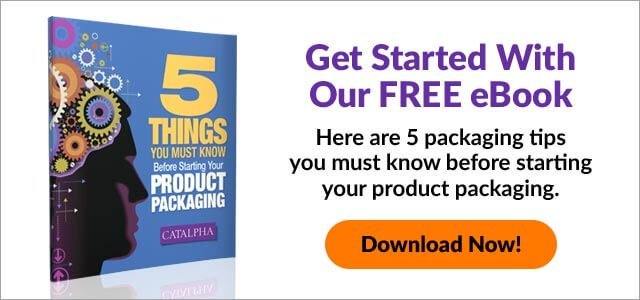
We've developed a series of 8 videos to help you understand the product packaging design process. These videos describe almost everything you need to know to get your product packaged. Design is impossible for me to teach in this short blog, but should you have those skills, our guide can get you further down the road to having your product packaged.
The parts in order are:
 |
 |
 |
 |
| 1. The Initial Consultation | 2. Estimating the Project | 3. Creating The Dieline | 4. Creative Brief & Market Research |
 |
 |
 |
 |
| 5. The Design Phase | 6. Design Refinement | 7. Photography | 8. Printing Your Package |
HI – I’m Don Keller, owner of Catalpha Packaging. We’ve been creating and printing packaging for over 25 years.
I'm often asked, ‘Just how do you go about designing my package?’ or ‘What is your packaging design process?
Here's How We Create Packaging That Sells
You’ve only got 3 seconds to sell a customer as they review their choices for the product they are looking for.
1. The Initial Consultation
Our first steps is an interview with LOTS of questions.
Here are some of them. But your answers could spur even more.
First tell me about your product.
What is it? Type of product. Does it go in the health section. The technology section? Personal care area?
What kind of stores would you sell it in? Drug store? Hardware store?
Maybe your selling online only? Packaging can still be important there as well.
How big is it? Would it fit on the shelf? Too big for a box? Awkward size?
If someone saw your product, will it be easily recognized? That is will your customers know what it can do for them by seeing the product?
Who is your competition? This is a big question that we can go into a little later, but for now - Is there competition? Is your product the first of its kind?
Who are the big players?,
What stores are they in?
What does their packaging look like ?
What type of package do you think it should be in?
How many packages do you plan to print?
What’s needed now?
Future orders?
You need to know how long it will take to produce?
You need to take into account any post printing timing you may need for shipping, doing the pack out, where you add the product to the package and do the final seal.
2. Estimating The Project
After you’ve talked with us in length about your product, your needs, your desires, your timing.
We’ll have a general idea of the type of package you need. We then put some numbers to your project.
We do that by making a suggestion based on your answers for the type of package that we think will work best for your product. And then we prepare an estimate for the creative charges (that includes the design, production, photography (perhaps) charges it will take for us to the artwork needed to print your package.
The other big part of your estimate will include a cost for printing. We’ll have to determine the size and quantity, paper/corrugate/plastic we’ll make your package out of.
And to do that we need a dieline. What is a die line you say?
Well, watch our next segment for a better understanding of dielines.
3. How To Create A Dieline
A Dieline Is needed for almost all forms of packaging. And a dieline is basically an outline of the box as if you were to unglue it and lay it flat on a table. Then create artwork that shows all the edges and folds, windows, glue areas.
You may need to take into consideration the thickness of the stock you are printing on so when folded, edges line up and your product sits into nicely
Here’s how we do dielines:
Determine the size needed by measuring your product
Make some assumptions to the type of package needed so it may require a glued bottom so your product doesn’t fall through. Or you want to display it properly in a window.
It may require an insert to hold your product.
It may require a peg hook hole. How will that be handled? With a tag in the back, built in?
Now we’ve got some of the measurements, we head to the computer and use a vector based software called Adobe Illustrator. It’s the industry standard for all the artwork needed for your packaging design.
Some larger organizations may use some proprietary software that helps them create software which tied into other parts of their company and gives them ideas for how much corrugate will be needed, ink usage, etc. It can get complicated but for our needs Illustrator does a pretty good job.
Now we have a dieline. We can then show this to a printer and they’ll know exactly what we are asking for and how to price it, how long it will take to accomplish.
Now we’ve got a good idea of your goals and your needs. We’ve created an estimate and you’ve accepted to work with us! That’s fantastic.
Now the next step is to get to work!
4. Creative Brief / Market Research
AT this point we’ve talked about your product once and we’ve made an educated suggestion at the type of package that would work and we’ve estimated your project, you’ve accepted AND now we are starting your project. Here are the steps we take to do that….
AND we’re back to MORE questions:
We start by having our clients fill out our CREATIVE PACKAGING BRIEF
Our brief is a series of questions that goes more in depth about your product and your audience.
Larger clients may even have this in their process but many don’t so we have our own.
We take a closer look at your audience. Just exactly who are they? What resonates with your audience?
What is the ‘pain’ that your product relieves?
What is your product’s story? Or your USP. Your Unique Selling Proposition? Why your product than someone elses?
We look longer and harder at your competition. Our process includes STORE VISITS.
That is we go to the stores where your product will most likely be sold and we look to see who is there, where would your product go? What shelf? Next to who. Are there opportunities for in store signage?
What does your competition look like? Do they have a color associated with their products? Will your product most likely be peg hooked? Or on a shelf ?
How can your product stand out in such an environment ?
Does your product need a lot explantion?
Will the audience know what it is without explantion?
Do you need a high end box to compete with the competition. What is your audience expecting?
Now we’ve got the background, the 411 on your product and goals.
5. The Design Phase
Once research has been completed and digested, we start on the initial design phase taking into consideration all the factors and info gathered (competition, colors, placement, audience, budget)
The colors of your logo influences our color strategy along with surrounding competition. If we are designing for a product line we will ask if a visual cue is needed to define pricing or feature factor.
First the structure that will hold the product must be rationalized. The structure determines the type of material your package should be produced with as well as whether it needs protection from breakage and the cost of printing. This also directs which resources can produce it.
We contact our vendors or printers that will be able to produce the package economically and in the time frame it is needed. This step will require multiple conversations with them to discuss how their capabilities fit with the specifications of the project, budgets, deadlines and retailer requirements. Some packages use multiple components and require more than one resource.
We choose the best paper / stock selection based on the ideas we present as well as the visual impact your brand needs to stand out on the shelf. If custom clamshell or blister packs are the direction you want, these will require extra attention and expense to create molds which will also affect time to completion and of course cost. Many times small production quantities result in our suggesting the use of a stock clamshell. With a unique custom insert, a stock clamshell can display your product for maximum store impact.
Large products require special attention. Large boxes have special printing considerations and are expensive in small quantities. If they need to be in a box, a custom printed sleeve can work well. It can be the most economical solution because it can be produced on thinner stock in a smaller footprint than a full box. Surprising to most of our clients, corrugate is one of the most expensive materials to print. Corrugate requires litho laminate printing. That is a process where a sheet of thin paper is litho printed and then laminated to a corrugate sheet. Hence the name. This type package requires printing plates and a large die, both of which add expense. Most printers won’t print a litho laminate package in small quantities. You’ll need to start at 5,000 to 10,000 pieces.
After the store visits, we go back to the office where we ponder the possibilities. This is where the magic happens.
We take the answers we gathered in your creative brief and start to apply them to the package.
For instance: We determine if your product needs explanation. What’s the best way to accomplish that? A diagram? Photography? Showing your product in use.
WE may have a chat with a photographer to know what they think of our photo thoughts and how to accomplish it.
We consider using stock images and photo manipulating your product into them.
We consider font choice and what the best choice may be. Funky, modern, upscale?
We take your outline of benefits and decide if they need to be enhanced for the package, expanded on OR shortened.
Sometimes too much copy looks crowded and makes it hard to read.
Once we’re happy with the designs we’ll present them to you. In most cases we’ll PDF them to you.
We might create a mock up box. To show thickness of specified paper OR your product needs to be held a certain way in the box.
We gather your feedback through a phone conversation of perhaps a skype call.
6. Design Refinement
Much thought is given to messaging and distilling your USP down to what will motivate a customer to pick your package up for more detail. NOT EVERYTHING will or should be on the front of the package. A cluttered package is an unread package. We glean a lot of text from what you provide in your Creative Brief and during conversations. When you provide text, please ere on the side of giving us more information than you think we may need.
Instructions and directions are sometimes needed for products. How should this be handled? It depends on the amount of instructions and the type of product. Products that are powered by battery or electricity require their own set of instructions and may need independent testing. How will these be used by the customer? Can they be small enough to go on the outside of the package OR should they be on a folded sheet or brochure to be inserted inside the package with the product. Depending on your product, you may need to contact a lawyer to protect your liability.
A UPC bar code is needed for every product sold by a retailer whether it is a brick and mortar store or a web store like Amazon. If you’ve never purchased a UPC, we can help explain how to get a UPC bar code. You can read more about UPCs here.
Nutritional chart, ingredients and other disclaimers are needed depending on the product. Nutritional information / ingredients can be obtained through independent food testing & analysis labs.
Ideation Usually Starts With Sketches
Yes, we can start with sketches, but that doesn’t always present the idea we want to get across. Our ideas are usually presented in a roughened state allowing us to present a few options without wasting your money fine tuning ideas that may not fly. Usually we begin with the front panel of the package. This is what the customer is exposed to as they walk the aisle. What it communicates has to appeal to the primary reason your audience needs your product. What benefit will they receive from purchasing it?
Once we’ve digested all info, we start our designs and usually present a couple of ideas to review via PDF, - or - in some unique package styles, a mock up to help you understand how the product fits the package.
How many edits can I do? We have a history of getting very close with our initial concepts. Two rounds of minor edits before we get to an approved concept is typically all that is needed and maintains an acceptable creative budget.
7. Photography
There are 3 types of photography we use that your package may need.
One is stock photographs. We use these to help keep costs down if needed.
2nd is simple product photography. Where you might need your product shown as a group on a white background
3rd is custom professional photography.
Most likely your product will need to be photographed. We can certainly use your images IF they are of a good enough quality and portray your product as we think it should.
If not, you will need to have it done OR have us do it.
Most times we’ll enlist the help of a professional photographer. You may need to show your product in use with a model in an environment. You may need a close up. We had to hire a model to show hands. We hired a model to show body parts
Mock Ups
Sometimes you may need a mock up only and not printed packages. This is usually needed when you have buyer meetings set up and 1) you can’t wait for all packages to be printed. OR 2) You know the buyer will want to add their input on the art.
We still need to go through the entire package process whether we print 1 or 10,000 pieces. Basically that’s finished artwork that is digitally printed at the size of the package. It looks very close to the finished package but only a couple are needed for your meetings.
8. Printing Your Package
As you’ve heard through these past process videos, we go through quite a process to do the creative artwork needed to create effective packaging for you. Now that you’ve given the approval on the art, we’re ready to get this package printed.
We’ve already established which vendor will be printing your package by now. Now we forward your art and request a proof. A printer’s proof will be our last check to check and make sure that all the art is correct. All copy is present, with no spelling errors. All colors are printing as expected. Nothing has mysteriously dropped off.
We don’t want any surprises. Many times these proofs are handled via PDFs but occasionally, a hard color proof is created and sent our clients for their eyes to review.
Once approved, the package is scheduled in the printing queue. Usually this process will take 15 business days. Once it is printed, it will be die cut and scored and glued. Then packed in boxes and ready to be shipped to you.
Here’s a quick video on what to expect when your printing arrives.
I hope you’ve found this packaging process helpful. Please feel free to reach out with any questions. You can reach me at the number below or any email on this site. We’ve tried to be as thorough as possible but we may have glossed over a point you still find confusing.